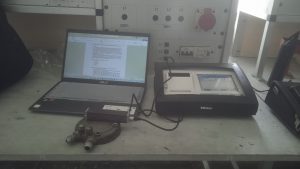
Description
Surface Rouhness Test is used to measure the level of surface roughness of a material. Each component surface of an object has several different shapes and variations both from its structure and from the results of its production process.
Roughness is defined as the subtlety of the form that accompanies the production process caused by machinework. The roughness value is expressed in the Roughness Average (Ra). Ra is the most commonly used roughness parameter internationally.
The measurement of surface roughness is obtained from the movement signal of the diamond-shaped stylus to move as a lyrical line on the surface as an indicator measuring the surface roughness of the test object. The working principle of Surface Roughness is to use a transducer and processed with a microprocessor.
The components of this Surface Roughness tool are:
- Dial Indicator
- Test field
- Pressure scale
- Display
- Data printer
Working principle or Working steps using Surface Roughness Tester
-
The test object is placed on a flat table.
-
The end of the dial indicator is set in a stable position to perform pressure scale readings on the surface of the test object.
-
Determine how long the part of the measuring object will be tested for surface roughness, later this length will be passed by the dial indicator.
-
If the dial indicator has performed a quantification along the distance we specify, the surface roughness will be recorded, and it can be seen in the form of a print out.
-
Before measuring, the test objects and measuring instruments have been arranged so that wherever possible there are no errors in the measurements.
